Showing posts with label Gardening Techniques. Show all posts

Tuesday, January 11, 2011

Cloche Encounters of the Fourth Kind

If I were Catholic and this was a confessional, I'd have to admit here that I've long had a hankering to obtain and use a real cloche in my garden.  Hankering?  Okay, call it a barely controllable lust. Pictures of beautiful classic bell-shaped glass cloches placed over perfect green tender foliage always light my soul on fire.  I've never, however, been able to physical and financially acquire the real thing, substituting instead plastic milk jugs or recycled bottles of large size when I needed protection for baby plants. I've always viewed the latter as poor tradeoffs, about as rewarding as eating dinner with your sister instead of dancing the night away with Marilyn Monroe.  Real, heavy, gorgeous glass cloches, though, have always been just too expensive for my budget.
 
Up until now, that is.  This weekend I wandered into the local Hobby Lobby to find that their large clear glassware, including two large heavy glass cloches, were all on sale for 50% off.  If I borrow J. Allen Hynek's classification for UFO encounters, I therefore just had a cloche encounter "of the fourth kind," or one that involved abduction (me) into the world of the Cloche.  Many gardeners have had a cloche encounter of the first kind (where they might have glimpsed one at a distance) or of the second kind (actually up close and warming the earth beneath it) or even the third kind (with a  tender plant actually covered and being protected by a cloche), but few are lucky enough to be proud glass cloche owners.  I joined that group with a quick local purchase and then added three more cloches from a weekend trip that included a visit to two more regional Hobby Lobby stores. so I now have a thriving set of cloche quintuplets inhabiting my garden.

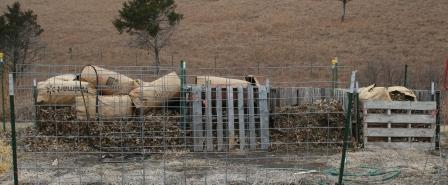
And just in time.  The first snow of the season hit Kansas on Monday, as the pictures of these 16 inch tall cloches illustrate (the second with a little snow knocked-off so you can see it better).  Somewhere beneath the drifts, my glass sanctuaries already protect some fall-planted Gallica bands hybridized by Paul Barden and a rooted 'Prairie Harvest' start from last spring.  And my winter landscape looks a little less like a milk-jug garden and more like somebody is gardening with a little class.

Cloche is the French word for "bell," referring to the classic shape.  For those uninitiated, a cloche acts like a miniature cold frame, controls temperature and humidity around young plants, and protects them against insects, wind, frost, hail, turkeys, and wayward dogs. The Internet describes the real cloche as being either of vague French origin or as having been invented in Italy in 1623, but my bet is on the French because of the name and because a plant in the French climate is more likely to need the protection than one in Tuscany.  Many gardeners, like myself, have rationalized for years that plastic milk jugs and jars are adequate and perhaps even preferable, but all of us know, deep down, that a good, heavy glass cloche is what we have always really craved.  There are commercial bell-shaped plastic garden cloches available at reasonable prices, and one can make a decent home-made garden cloche that looks nice, but in my Kansas winds, I need something heavy enough to stay put instead of tumbling along to the Atlantic.  Besides, I'm tired of picking up pieces of weathered, shattered milk jugs from my mulch.  

So, if you're also seeking a cloche encounter of the fourth kind, watch for the next Hobby Lobby sale cause this one ended last weekend. If you're in Kansas, you are just out of luck anyway since I bought all the cloches currently available in the state.

Friday, December 17, 2010

Compost Musings

YES I compost, YES I do, YES I compost, how about YOU?

Sorry.  Some of the enthusiasm I occasionally run into when I talk about composting within earshot of the WEE crowd (Wild-Eyed Environmentalists) brought to mind an old cheer from high school basketball games when I thought about starting this particular blog, and that led to memories of friends and classmates who were high school cheerleaders or "pom-pom" squad, and that, of course, revived other old enthusiasms and left me mentally wandering....but I digress.

Actually, to be truthful, I was late to the composting game as a gardener and I still do it haphazardly.  For the first years of my gardening life, I was fond of throwing the weeds back down where I pulled them and letting nature do the work (I still do, to the chagrin of my wife, if I'm weeding far from the compost pile).  I am certainly not a religious convert to the organic-only mindset and, forgive me Gardener, but I routinely sin and don't compost many items which are compostable.  I don't, for instance, walk my wife's coffee grounds down the hill in the freezing Kansas wind to add them to the pile.  Nor the banana peels, or eggshells, or wilted celery.  My desire to compost, I'm afraid, ends at the onset of cold weather.  Just last week I read a locally-written article on how we should turn our compost piles every month in the winter.  Really?  I don't know about you, but here in Zone 5B, my compost pile has been frozen rock solid for the past three weeks and it'll likely remain that way through March.  I wonder if the local writer has really gotten out and tried to turn his compost pile lately, or if he was reading and passing on information written in Britannia or southern Texas?

Towards my salvation, though, over the past several years a good friend who lives amidst the trees has provided me with as many bags of fresh  fallen leaves as I can drive away with.  Routinely, that means that in making the compost pictured above in my makeshift compost pile, I've added about 50 large bags of leaves to the mix annually.  In fact, as you can see pictured below, I have several bins where leaves remain half-rotted until I begin cutting summer grass and pulling weeds.  I mix in the leaves with the green fresh material as it becomes available, and then turn the pile back and forth between bins until finally, all those bushels of leaves and grass become the pictured half-bin (2X4X4) of mostly compost.  


I certainly don't make great compost, however.  Somehow, I never reach the black, crumbling texture described in all the books, even though my soil thermometer tells me that I reached the prerequisite temperatures at least twice this year.  Perhaps, being intrinsically lazy, I don't turn it enough since I probably only turn it completely about 3 times in a summer.  Sue me, I just can't face turning the compost pile when the July sun is high and the temperatures start at 90F and end up at 109F.  And I probably don't water it enough. Although I try for the "wrung-out" sponge dampness, I mostly see repeatedly watering the compost pile as a bit of a waste of water in a landscape where water is a precious commodity during the summer. And maybe I fail because I mix in whole leaves and grass clippings and I don't chop them up fine enough. 

But, even half-finished, the plants don't seem to complain when they're mulched with my meager offerings.  And I trust the ingredients of my compost enough to put it on my vegetable garden, in contrast to the local municipal compost.  The latter, while free and available in large quantities, tends to have a bit of gravel, bottle tops and rubber items occasionally mixed in.  I might not mix my partially-aged compost into the soil for fear of losing a little available nitrogen, but the worms seem to appreciate its presence as a mulch. 

I'll leave you with this very deep thought:  however reluctantly and imperfectly, I suppose all gardeners eventually compost.


Wednesday, December 1, 2010

Edge your Paving!

For all the do-it-yourselfer gardeners out there, this post is a flat-out informational piece in hopes of having you learn from my mistake.  And this particular one concerns the importance of using "paver edging" for your brick paver projects.  Please do-as-I-say, not-as-I-do (did).

About two years back, during my preparation for having my garden appear on the local area Annual Garden Tour, I erected an octagonal gazebo from scratch (kids, don't try that at home!).  Because of the prevailing gale-force winds of Kansas, I erect all outdoor structures with the anticipation that a tornado will appear over the next ridge at any moment, and so my structures are overengineered to last wherever possible; no less so this gazebo which is anchored by eight posts cemented into the ground.  For a floor, since I disdain wooden raised gazebo floors under which snakes and pack rats may breed in private perpetuity, I laid brick pavers for an approximately 10 foot square floor.  I'd had good luck with pavers elsewhere in contained areas, so I knew to place a good sand base down and level the pavers, but I'd never made a free-standing form in the middle of the yard before, and I'd never heard of brick paver edging.  Such are the mistakes made by those who think they can just muddle into the job.

Alas, you can guess that the result was having the bricks at the edge eventually shift away from the center on all the edges, as pictured at left above, leading to an unattractive affront to my in ordnung sensibilities.  Fortunately, the K-State Gardens had recently installed a paver walkway and I had carefully observed the construction and learned of the importance of paver edging.  Paver edging is a simple commercial strip of plastic, "L"-shaped in cross section, that we lay down beneath and along the edges of our paver constructions to prevent just such migrations.  Priced at approximately the weight of the plastic in gold, it should nonetheless be viewed as  a necessity in your paver designs.

The result of a few minutes work yesterday was to lift the bricks at the edge, lay the paver edging and re-square my gazebo floor.  Happily, the Gardening Gods gave me a 60oF November day to make it all work out.  Now, hopefully, a real tornado won't come over the hills and send my gazebo to New York by air mail, but if it does, I have a nice ten-foot square dance floor in the middle of my garden that should hold up to foot traffic for years to come.

Saturday, October 30, 2010

Happy Bluebird Trails

Yes, I'm one of those wild-eyed environmental (WEE) wackos that cares to keep bluebirds from the brink of extinction, and so I annually maintain a "Bluebird Trail" for the purpose of providing proper nest areas for those beautiful creatures.  Former President Jimmy Carter may have his Habitat for Humanity thing going, but I'm much more interested in seeing the bluebirds stay on the prairie.

Eastern Bluebird in my backyard
Bluebirds are in danger of becoming the next Carolina Parakeet or Passenger Pigeon without our help. Their numbers became dangerously low in the 1970's because they are cavity nesters.  Man, in his infinite wisdom, cuts down and destroys all the dead tree stumps that would otherwise provide natural cavities for the bluebirds and they also have competition for the few remaining natural cavities from sparrows (introduced to this country in the 1850's, again as a mistake by Man because He thought sparrows would eat crop insects, not become the nuisance pests they proved to be) .

Bluebirds and I have a special relationship.  My spirits are revived each spring as they arrive to begin nesting in February.  When we were building our current home, more than once I visited the framed but not yet walled-in house to find a bluebird sitting on a windowsill, as if blessing the building of our house with his presence.  Their quick little bounces while flying always lighten my mood.  And if you've read this blog long, you know I'm a sucker for light sky blue colors in the garden in any shape or form.  I've maintained a Bluebird trail, now up to sixteen boxes, for a number of years in my small attempts to aid the bluebird comeback.  This year I fledged 6 bluebird families from the 16 boxes, with 2 more nests of other species found.  My record was 8/12 bluebird nests several years back.


 In fact, I'm so into the Bluebird Trail concept that I've done some investigation into box design and also designed my own.  I started out by purchasing some typical commercial boxes from Walmart, but along the way I've built and tried lots of others. Somewhere out there on the Internet, you can find specific designs for different forms of bluebird nestboxes, from the NABS (North American Bluebird Society) box to the Peterson box and back again. Bluebird enthusiasts can debate front- and side-opening designs, floor designs, hole shapes and diameters, and hole positions till eternity passes.  Placement and construction of the boxes is critical to draw bluebirds and repel other species.  The box should be placed in grasslands away from trees and shrubs and about 4-5 foot high.  It should be away from houses as well to deter sparrows.  Size dimensions for the nest box are critical and the hole is also carefully shaped and sized (Starlings don't use oval holes and sparrows need wider ones than the 1 3/8 X 2 1/4 inch oblong hole now recommended).  Classically, the hole is placed closer to the top of the box, but another researcher has suggested that sparrows are also deterred if the nesting cavity is shallow, with the hole nearer the bottom.  Every year you must clean out and maintain the boxes to prevent disease in early Winter, before the bluebirds return to nest in February.

I've taken the best features from research to create my own simple design, which I must say seems to be remarkably effective on my little patch of prairie. Five of the six bluebird nests I had this year were produced in the six nest boxes that I've built of my own design and the sixth box was simply empty (without a sparrow nest).  The other ten boxes of commercial and other designs had only one bluebird nest among them, but two other nests from other species. At Photobucket, you can download a jpg of the "Roush Bluebird House" construction (page 1) and a diagram of how to cut up the boards (page 2) if you click on the links.  It's cut from standard lumbar widths; cedar is best for durability. It's a similar box to the Peterson box, with a larger bottom and a lower entrance.  I find front-opening boxes to be the easiest to clean.

So please, whatever design you choose, choose to help the Eastern Bluebird. I regret that I will never be able to see a Carolina Parakeet or Ivory-billed Woodpecker and I wasn't even responsible for those extinctions.  I'd like my grandchildren to still be able to enjoy a flash of blue in their gardens.

Monday, October 4, 2010

Just Cut It Out

I must admit there are times, even though I'm a plant fanatic first and a garden designer second (or, truthfully, last), that I am forced to see the folly of my ways and can even grow to hate a given plant. I don't often hate the plant for being a bad plant, mind, I usually just hate a specific specimen because of my own error of putting it in the wrong place or underestimating its ultimate size or for not providing the proper maintenance, or some combination of all of the above.


At such times, the longer I garden, the more willing I am to face facts and sever the apron strings; or in this case, the plant's stem.  Look if you will at the 'Josee' lilac (Syringa x 'Josee') in my front garden (arrows).  Now five years old, it has grown far bigger than the tag suggested, it obscures a window, and it is out of proportion with the rest of the front shrubs and perennials.  I tried cutting it back severely once, but a year later it is right back where we started; too big. To make my distaste for this plant worse, although I planted two of these beauties because they were the only reblooming lilac on the market (one in this bed and one in back of the house), neither has rebloomed well;  they do have a nice bloom in the spring towards the end of the period of the S. vulgaris hybrids, but then they have only a few sporadic small blooms over the summer and fall.  Now I could be partially to blame for that problem since the front bed of my house faces almost due north and so this particular lilac gets too much shade except in the summer, but the specimen I planted out back doesn't bloom any better and it gets southern exposure, full-day Kansas summer sun. 


So, on my list of things to get done this fall, I included banishing this lilac to a far bed on the property, perhaps never to be seen from again if it doesn't survive the move.  As you can see in the second picture, my front garden benefited tremendously from not having this behemoth squatting and pouting in the shade, and you can now see the house has a third nice window on that side.  And I'm happy, oh so happy, to be rid of that display of my horticultural ignorance. 

Sometimes I think I just need to let my surgeon side shine through more in the garden.  Amputation or excision is almost always the best first choice for treating a cancer and I know that, at least on a professional level.  Remove the tumor, cleanse the soul.    

Saturday, October 2, 2010

Pictures for Ourselves

Do you take pictures of your own garden?  If you don't, I'm going to take this moment to demand that you go find or purchase a camera and get to it.  If you already take pictures of your own gardens, then I'm going to request that you take them more often.  Nowadays, with digital cameras, hundreds of pictures cost pennies, so the downside of have developing and printing costs decrease your budget for plant purchases are no longer an excuse.  I promise, you'll see your garden differently through a camera lens.

I find myself in the garden more and more often with a camera in hand, and I never regret the time spent taking or looking at those pictures.  I catalog plants by their photos, I document my garden's growth and development in pictures, and I mark the change of seasons and the frequent Kansas storms with pictures of their majesty and their damage paths in my garden. But most of all, inside all those pictures, instead of seeing the garden through the eyes of its gardener, I see the garden through the eyes of a visitor.  I can experience the garden, instead of experiencing the process of gardening.

    
We find it difficult, the "we" of gardeners in general, to separate our vision of our gardens from the little things that irk us  I can't look at my garden and not see the occasional weeds, the faded mulch that I know is there, the drab grass clippings, the phlox I should have deadheaded, or the blackspot on the roses.  But through the camera, I forget about all those things and I'm able to see the garden through different eyes; the eyes that can appreciate the garden instead of the eyes that work in my garden.

For example, I was thinking lately that my garden, here in September at the end of a hot summer, was lacking color, a little drab, or maybe a little beaten up.  But look at the picture of my front garden above, facing away from the front door of the house, taken on September 25th.  Boy, was I wrong about the color!  Look at combinations of the 'Betty Boop' rose on the left, the 'Emerald Gaiety' euonymus of the foreground, the burgundy foliage of 'Wine and Roses' weigela in the background, the two varieties of sedum in bloom, and even the bright red rugosa rose 'Hunter' out of focus in the far right background.  I also know that on the left, just out of the picture, are the still-blooming remnants of the white phlox 'David' and to the right, the red Canadian rose 'Champlain'.  How much more color could I expect?  With my "gardener's eye" I just couldn't see the color separate from the sidewalk, the mulch, and the surrounding fields.  With my camera's eye, I can see the beauty that others see.

If I'd just been bright enough to remove the dead daylily scapes before I took the picture it might look even better to me.

Friday, October 1, 2010

Good Grief; 'Griff's Red'

It never fails, does it?  A gardener gives up on a plant and then low and behold there it comes again, fighting its way back from oblivion.  Right after you've planted something else in its stead, of course.

I've had a 'Griff's Red' rose for several years while it struggled along (the most charitable way I can put it) in my more formal "hybrid rose bed" in the shade of  three taller roses, a 'Variegata de Bologna', a 'Prairie Star', and a 'Prairie Harvest'.  It has meagerly clung to life in the shade and clay, barely putting up a cane for two years running.  This spring I decided to move it to the front of another bed (to replace yet another failed rose) where it would get more sun and better attention from the gardener.  Again, it put up a single cane about a foot high, limping along with one bloom to reward me for the summer, and then in July, a high wind took out the final cane.  I waited and waited for signs of life and finally in late August, I gave up and planted one of the new Paul Barden gallicas, 'Marianne', in the spot (see my blog titled I Dream of New Gallicas).


But, as I'm fond of quoting, "life found a way."  The picture above is of the 'Marianne' on the right, in the ground only a month, and the 'Griff's Red' on the left, the latter looking healthier than I've ever seen it with two young canes.  As soon as the August heat left, up popped 'Griff's Red' to remind me why I choose to grow own-root roses as often as I can find them.  Of course, I moved the  'Marianne' immediately, fortuitously to a new rose bed I had started with four other Barden roses.  Griff deserves another chance.

'Griff's Red' is a hybrid-tea style rose bred by the late Professor Griffith Buck at Iowa State University and introduced in 2001.  In fact, it's one of the "lost Buck roses," which means it was introduced after his death, by Dr. Buck's wife and daughter from the Buck rose-breeding stock.  Of the Buck roses, it's the best, brightest red, the four inch double blooms colored a fine ruby-red.  It's a well-refined bush, reaching only about three by three feet maximum and hardy to Zone 4.  It seems to be fairly resistant to blackspot and mildew, since I've never seen either on it, but I'm at a loss to explain my struggles with the plant except that I never gave it a chance to get going well, I guess.  I got mine from Heirloom Roses, which, last I checked, still offers the rose for sale.

Next time, I'll wait longer.  I promise.

Wednesday, September 22, 2010

A Little Piece of Texas

Like most of the US population, Kansans sometimes exhibit a little bit of Texas envy, manifested in the gardening population of Kansas by a desire to grow Texas Bluebonnets and Indian Paintbrush.  Since neither of the forementioned plants are reliably hardy in my climate (don't think I haven't tried!), I've turned to another native Texas plant to satisfy my yearnings; Red Yucca, also known as Texas Red Yucca or Red False Yucca.

Of course, since I've only been in Texas once, not counting a few hops through the Dallas-Fort Worth airport, I was introduced to Red Yucca (Hesperaloe parviflora) in Las Vegas, where it serves as a common xeri-landscape plant.  I'm sure any native Las Vegans, if in fact there are any, could identify the plant on sight, but I suffered on that particular trip from being in a foreign climate where a) I had no real idea what I was looking at, and b)  neither did any of the people working for the hotels and casinos that I asked.  From experience, I'm guessing that casino dealers and hostesses as a general rule don't spend a lot of time admiring the casino landscaping.  Identification had to wait for my return home and access to a computer, where I recognized Hesperaloe on the High Country Gardens website as the plant I'd just spent three days lusting after.

Hesperaloe parviflora 'Yellow'
Red Yucca is found native to the Rio Grande and northern Mexico area, in the Chihuahuan desert, where it matures to a 2-3 foot high and 4 foot wide succulent mound with narrow blue-green leaves and filamentous edges.  The plant flowers over a long period with inverted bell-shaped flowers of coral red, and it is well-suited for xeriscaping by its drought-tolerant, full-sun requirements and its preference for alkaline soil.  I was happy to see that it's a favored plant by hummingbirds and requires little or no maintenance beyond cutting down the flower stalks.  In fact, one helpful Internet gardener commented that it grows in very poor soil, "virtually no soil," so it seems made for my Flint Hills clay.  It's supposed to be hardy to zone 5, and evergreen to boot, so I'm giving this one a chance in my garden.  I've planted two different varieties from High Country Gardens, the red Hesperaloe and a yellow form (Hesperaloe parviflora 'Yellow'), both in somewhat well-drained poor-soil areas. Both survived the hot, dry summer we just had and needed minimal extra watering for establishment.   The yellow form, pictured at left, is doing great and probably has doubled in size since June, although it hasn't yet bloomed. I have great hope for it as I've seen reports of it growing in Denver, Colorado, and Shawnee Mission, Kansas, the latter just a hop, skip, and dead plant away.

So, once again, I'm stepping out into the murky waters of zonal envy and pinning my dreams for garden excellence on a whimsically-chosen plant glimpsed in someone else's climate.  You'd think I'd learn, expecting providence while staring from warm September down into the depths of a Kansas winter.  You'd think all gardeners would learn, but gardeners, more than all other human strains, seem to remain eternal optimists in the face of repeated failure.

Monday, September 13, 2010

Labeling; well, I tried

A recent post on Gardenweb.com reminded me to check up on an experiment I tried a summer back in my garden.  In 2009, when my garden was on the local annual Garden Tour, I put a little time into labeling most of the roses.  Knowing that the zinc/soft pencil labels are notorious for fading, I decided to spray some of the labels with Helmsman Spar Urethane, chosen because "it forms a protective barrier against rain and moisture" and "the enhanced ultraviolet absorbers found in Helmsman reduce the graying and fading effects of the sun."

Well, you can see the results below.  The three labels pictured were all created and put into the garden in Spring, 2009 and remained there, so they've been exposed to two Springs, two hot Kansas Summers and one very cold Kansas Winter. The urethane coating did decrease the fading, but there was a drawback, as you can see in the third picture;  at some point the urethane flaked off a number of the labels leaving them worse than before.  I'd say about 50% of the labels look like the first picture at this point and the other 50% look like the third; or worse.  We'll call this experiment a gigantic fail.


Coated Label at 1.5 years

Uncoated Label at 1.5 years

Oops;  flaking away...should say "Buck Rose" at the top

Back to the drawing board, eh?  Must make a note to redouble my efforts to keep plant locations listed on the computer....and backed up.

Wednesday, September 8, 2010

Assigning Blame

Early Fall is always a good time to look over the garden and determine which individual plants haven't done well over the growing season, and then to assess blame and amend our gardening practices to allow us to improve next year.  At issue, though, seems always the uncertainty of the cause of the failure.

 For example, take the 'Jen's Monk' Hybrid Rugosa rose pictured at the right.  Normally a dependably- blooming, care-free and disease-free rose, I first noticed the browning of a majority of the bush in mid-August this year, far too late to prevent it.  Literally, about 3/4ths of the canes were bare when I  finally discovered the damage and the remaining leaves already shriveled and dead, while the other 1/4 of the bush looked relatively normal.  It would be easy to attribute the damage to the summer drought we've experienced, but was it really?  I could find no other explanation, no insect damage or webbing, no evidence of mildew, and the ground was indeed bone dry around it, but why this rose and not one of the other twenty-six in the bed?  Who would think that a rugosa would be more likely to have drought damage than the more smooth-leaved  'Alchymist' in front of it or the 'Robusta' or 'Louise Odier' on either side of it? Not me.  Thankfully, the damage seems to have stopped spreading (because I watered it, or just on its own?) and I have hope that only the leaves are lost and those bare canes will again leaf out anew next year and maintain the vase-like shape of the bush. If not, I'm resigned to trim it back next year and let it regrow from the base. 

Looking around the yard, I also have decided that I finally am giving up on a Weigela florida ‘Wine and Roses’ in a lower bed because it never did leaf out well this spring.  It has been in the spot for 3 years, now a four by four foot bush, but while it did well in the previous years, it never got going this time around.  It put up a spare few leaves in the spring at the tip of the stems and then, as the spring continued, those leaves collapsed and dropped off.  Was it the colder winter we had last year?  If so, why did another 'Wine and Roses' exposed to the full northern wind in a raised bed survive just fine?  Was it the wet spring and my clay soil?  Did it develop root disease of which I'm unaware?  What can I learn from this other than to put something else, say a crape myrtle, in its place?

I'm also perplexed at the seeming collapse of an enormous Sambucus nigra ‘Beauty’ elderberry that's been growing in the same spot in my "peony" bed for 6 years now.  This dark burgundy finely-leafed specimen is surrounded by three yellow-foliaged shrubs, making a nice dependable contrasting foliage spot in my garden.  Yet, two weeks ago, there it was, leaves completely gone and bare stems covered only by an invading green wisteria vine from nearby.  What the heck?  Another drought victim?  Insect raid?  Cold damage?  I think it had started out the year well, but now, I can't remember for sure if it bloomed as expected in the spring.  All I can do is cut it back and hope it grows out again in the spring.

I hope you learn what you can from your own gardening disasters this year, but if not, you're in good company.  I, for one, have learned only that I have a lot left to learn about gardening.  

Monday, August 9, 2010

Hot Lists

In these dog days of August, when gardening in the Flint Hills is confined only to the most critical tasks and then only in the early morning or late evening, Kansas gardeners turn our fantasies towards the future of the garden rather than facing the brown, crunchy gardens we have. 

At such times, the most useful action is not for the gardener to plan that new gazebo or the 10,000 gallon koi pond, but instead to begin to make a list of all of those smaller autumn changes that will improve next year's garden.

Syringa 'Josee'; gorgeous but too big
I've been making that list myself, noting that the 'Josee' lilac in my front landscape bed is now six feet tall and wide, is grossly out of proportion to the rest of the plants in the bed, and it obscures the front windows.  It needs to be moved this Fall to a more spacious and less conspicuous area. Several tall Miscanthus clumps in the front areas of another bed need to be moved to the back areas of those beds so that they don't obscure late summer blooms from a few of the roses.   The Fallopia japonica 'Variegata' in front is starting to make its run and it grows a bit too large and sprawls too much for its area and it needs moved as well. Two volunteer bush clematis (Clematis integrifolia) need to be potted up and given away to some unsuspecting soul or souls. Likewise, several traveling 'Tiger Eye' Sumac need to be either given away or eliminated from my viburnum bed. An 'Applejack' rose in my East rose bed has too much shade from the more massive shrub roses around it and needs to be moved into a more sunny area. A few borer-infested stems of an old French lilac in my forsythia bed need to be cut out.  And, since the cool, wet spring here taught me that my iris are struggling in my swampy, clay, mixed iris and daylily beds, I need to begin to move the iris into a better drained location where they can thrive instead of rot. 

Sounds like a busy Fall is coming, doesn't it?

LinkWithin

Related Posts Plugin for WordPress, Blogger...